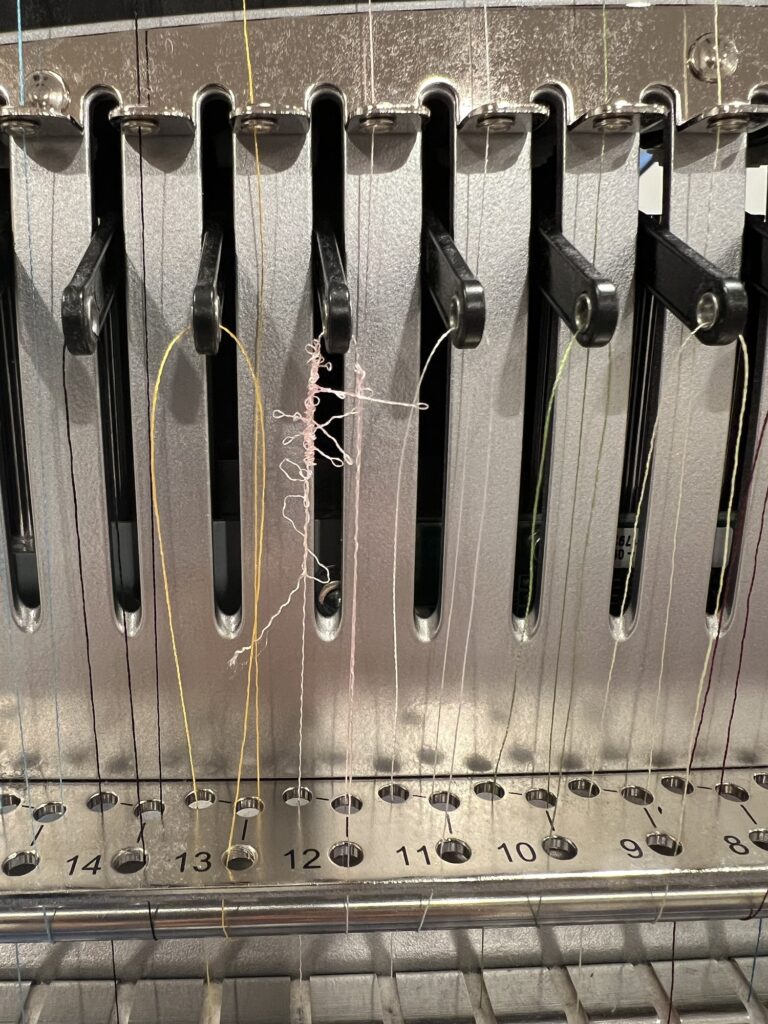
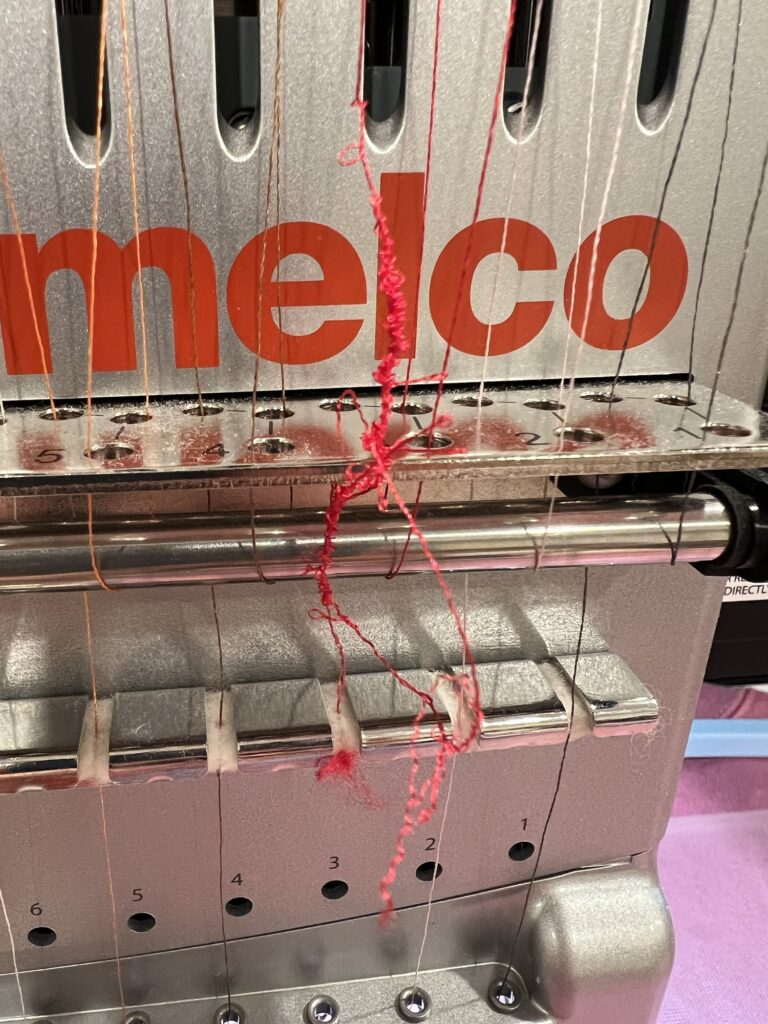
Thread breaks are one of the most common, and most frustrating, problems in embroidery. Whether you’re just starting out or you’ve been stitching for years, a snapping thread can throw off your whole design. The good news? Most thread breaks have a simple fix. Here’s how to prevent thread breaks during embroidery and keep your machine running smoothly.
1. Re-thread Your Machine Completely
This sounds too simple, but it works. If your thread keeps breaking, the first thing to do is remove the thread entirely and re-thread from scratch, both the top thread and the bobbin. A thread that’s slightly off track in any guide or tension disk can cause repeated breaks.
💡 Tip: When re-threading, cut off the section of thread that looks damaged or frayed. You want to start fresh with a clean, intact section.
2. Check Your Needle
A dull, bent, or wrong-sized needle is one of the top causes of thread breaks. Embroidery needles have a larger eye and a slightly different point than regular sewing needles, designed to handle the friction of dense stitching.
As a rule of thumb, change your needle if you notice skipped stitches, thread breaks, or a popping sound while stitching — these are signs the needle is dull or damaged. For home machines, a common guideline is every 8–10 hours of stitching, but on a multi-needle machine you can go much longer as long as your stitching looks clean.
💡 Tip: Make sure your needle is inserted correctly. Embroidery needles have a flat side (back) and a rounded side (front). If the needle is inserted backwards, you’ll get constant thread breaks no matter what else you try. The flat side always faces the back of the machine.
Needle inserted backwards and constant thread breaks occurred.
3. Match Your Needle Size to Your Thread and Fabric
Using the wrong needle size can cause the thread to shred or snap. A general guide:
- Light fabrics (t-shirts, thin cotton, thin sweatshirts): size 75/11
- Medium fabrics (thick sweatshirts, canvas): size 80/12
- Heavy fabrics (denim, thick fleece): size 90/14
When in doubt, go up a size — a slightly larger needle reduces friction on the thread. I mostly embroider on t-shirts and sweatshirts, so size 75/11 covers most of my projects.
4. Check Your Thread Quality
Not all embroidery thread is created equal. Cheap thread is more likely to have inconsistent thickness, weak spots, or excessive lint — all of which cause breaks. Stick to reputable brands like Madeira, Robison-Anton, or Isacord for more consistent results.
I personally use Robison-Anton Super Brite Polyester and Isacord, and both have been great for me. The main difference is the color range — so I keep both on hand depending on the project.
Also check that your thread isn’t old or dried out. Thread stored in direct sunlight or dry conditions can become brittle over time and much more prone to breaking.
5. Adjust Your Thread Tension
Tension that’s too tight puts excessive stress on the thread and causes it to snap. Most embroidery machines have a tension setting between 0–10, start in the middle range and test on a scrap piece of fabric. If you’re still getting breaks, try lowering the tension slightly.
6. Slow Down Your Machine Speed
Running your machine at full speed on dense designs or thick fabrics generates more heat and friction — both of which can break thread. Try dropping your speed to 60–70% for detailed sections or when working on heavy materials like fleece or denim.
7. Use the Right Stabilizer
Without proper stabilization, your fabric shifts during stitching, creating uneven tension that snaps the thread. Always match your stabilizer to your fabric type:
- Cut-away for stretchy fabrics like t-shirts and sweatshirts
- Tear-away for stable, woven fabrics
- Topping (water-soluble) for fluffy or textured fabrics like fleece or towels
8. Check the Bobbin
A poorly wound, incorrectly inserted, or low bobbin can cause tension issues that lead to thread breaks — especially on the top thread. Make sure your bobbin is:
- Wound evenly and not too tight
- Inserted in the correct direction
- Not running low on thread
When in doubt, replace the bobbin before starting a new project.
9. Clean Your Machine Regularly
Lint and thread fragments build up in the hook race, bobbin area, and needle plate over time. This buildup creates friction and can cause thread to catch and break. Clean your machine after every 2–3 projects, and oil it according to your manufacturer’s guidelines.
10. Check for Rough or Sharp Edges
Sometimes thread breaks because it’s catching on something — a rough edge on the needle plate, a burr on the hook, or even a small nick in a thread guide. Run your finger gently along the thread path to feel for any rough spots. Even a tiny burr can shred thread repeatedly.
Final Thoughts
Preventing thread breaks during embroidery usually comes down to regular machine maintenance, using quality materials, and taking a moment to check your setup before each project. Work through these fixes one at a time and you’ll likely find the culprit quickly.
If you love embroidery but would rather skip the troubleshooting, check out my handmade embroidered pieces in Chloe’s Boutique on Etsy — each one is stitched with care so you don’t have to worry about a thing. 🧵