Disclosure: This post contains affiliate links. If you purchase through my links, I may earn a small commission at no extra cost to you. I only recommend products I have personally used or carefully researched.
Sleeve embroidery is one of the most requested personalization I do, and one of the things embroiderers are most nervous about. What hoop do I use? How do I stop the back of the sleeve from getting caught? Do I need special equipment?
Good news: you don’t need anything special. I hoop sleeves flat, manually, and it works perfectly every time. Here’s exactly how I do it.
Watch me do it in real time first:
In this video, I’ll show you how to hoop the sleeve using the regular round hoop, not a Mighty Hoop.
(video coming soon)
What Makes Sleeve Embroidery Different
Sleeves are narrower and more tubular than a flat garment, which means:
- You can’t fit a large hoop inside
- The back of the sleeve can get caught in the stitching if you’re not careful
- Design size is limited by the sleeve width
Once you know how to handle these three things, sleeve embroidery is actually straightforward.
What You’ll Need
- Your garment
- Cutaway stabilizer (backing)
- Water soluble topping — for t-shirt sleeves
- Regular circle hoop — 12cm or 15cm
- Mighty Hoop — for longer designs only
- Your embroidery machine
Which Hoop Should You Use?
This is the question I get asked most about sleeve embroidery. Here’s my simple rule:
- Small design or 1-2 names → regular circle hoop, 12cm or 15cm
- Long design or 3+ names → Mighty Hoop, hooped flat
Sleeves are narrow, so large hoops simply won’t fit. I use 12cm and 15cm circle hoops for most sleeve work — they accommodate the sleeve width without distorting the fabric.
Step by Step — How to Hoop a Sleeve
Step 1 — Choose Your Hoop Size
Measure your sleeve width and choose a hoop that fits comfortably inside without stretching the fabric. For most adult sleeves, 12cm or 15cm works well.
Step 2 — Prepare Your Backing
For sleeves I cut the backing close to the hoop size since space is limited — if it’s smaller than the hoop, use temporary adhesive spray to keep it in place. For knit sleeves, always use cutaway stabilizer — not tearaway.
Step 3 — Position Your Design Placement
Decide where you want the design to sit. For sleeve embroidery I measure up from the cuff to find the right placement. When hooping, make sure to position the hoop away from any seams — including the sleeve seam and the cuff seam — as hooping directly on or near a seam creates an uneven, unstable surface that can cause the design to shift or pucker during stitching.
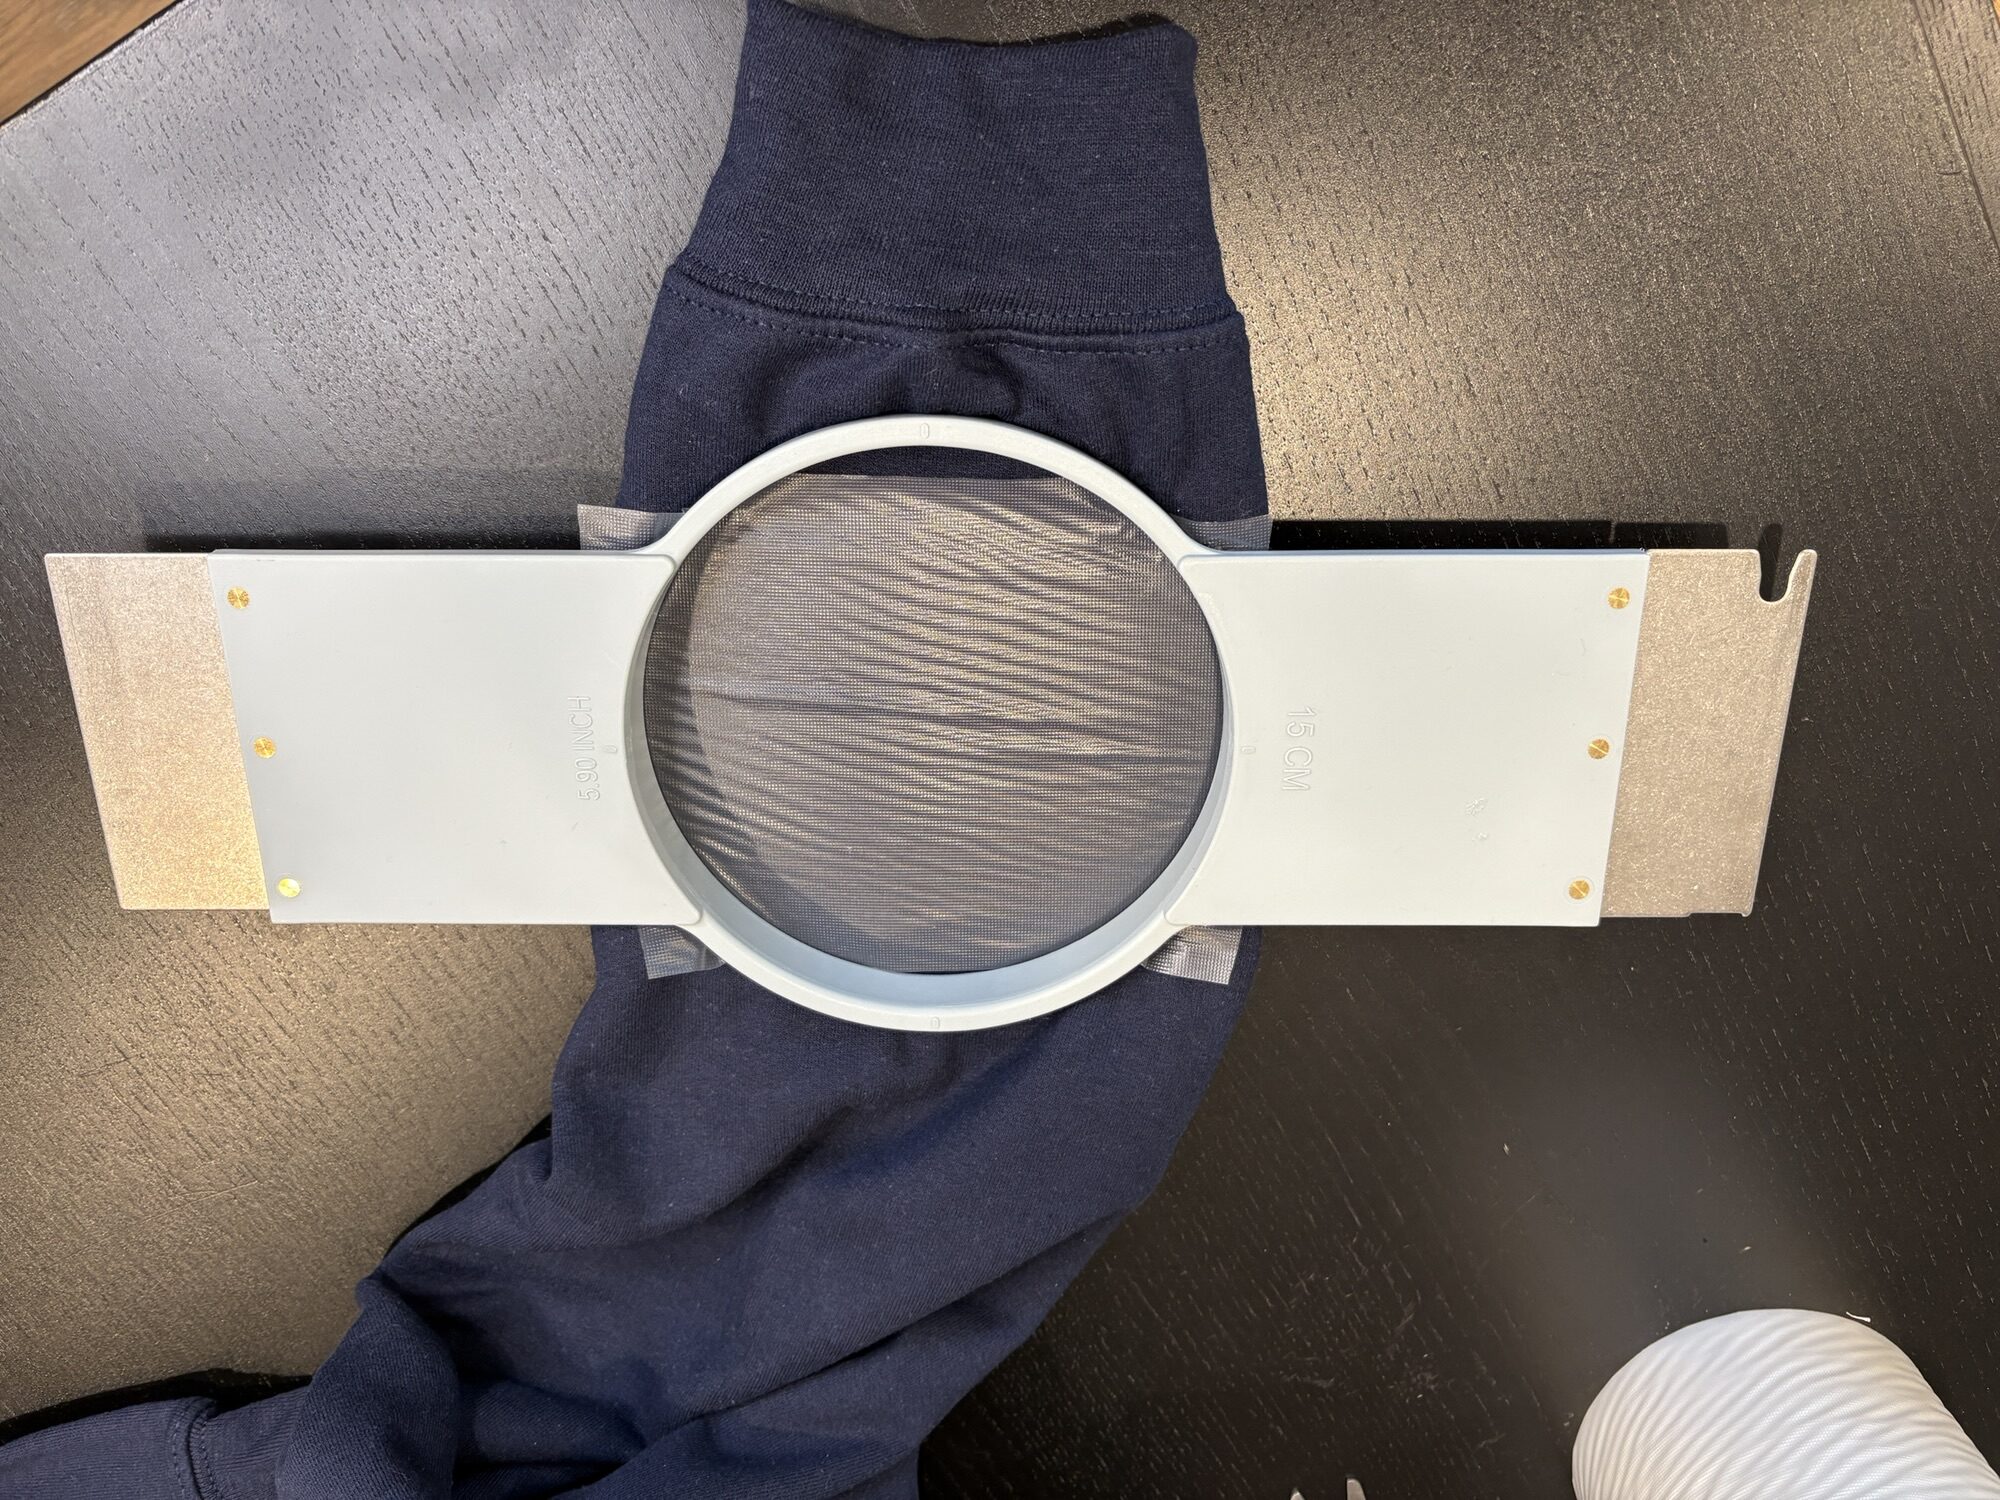
Step 4 — Slide the Bottom Hoop Inside the Sleeve
This is the key step. Slide the bottom ring of your circle hoop inside the sleeve via the neck hole and position it so the embroidery area is right in the center of the hoop. Make sure the ring adjuster is accessible from the sleeve opening in case you need to tighten or loosen the bottom ring. Pull the back of the sleeve away and make sure it is completely clear of the hoop area — this prevents it from getting caught in the stitching.
Step 5 — Lay Your Backing
Lay your cutaway stabilizer on top of the bottom ring, centered over the embroidery area. Use both hands to adjust the backing position from the neck hole and the sleeve opening. Make sure the backing is even and completely covers the embroidery area.
Step 6 — Apply Topping
For knit sleeves, place a piece of water soluble topping on top. I keep three widths on hand — 5″, 8″, and 10″ — and choose based on the design size. For sleeves, the 5″ covers most designs with 12cm and 15cm circle hoops.
Step 7 — Hoop It
Press the top ring of the circle hoop down over the bottom ring to secure the fabric sandwich. Make sure the bracket hook is on the correct side. When loading the hoop onto the machine through the sleeve opening, rotate the design 180° in your embroidery software before sending it to the machine — this way, once it stitches out, it will read correctly.
Step 8 — Attach to Your Machine and Trace
Attach the hoop to your machine. Check that the stabilizer is sitting right under the fabric — you can confirm this by feeling the surface once the hoop is attached. Before stitching, use the trace function to confirm placement. Also double-check that the top and bottom rings are securely locked together — if they aren’t properly tightened, the bottom ring can fall out mid-stitch, and while you can re-hoop, the design will be off-register since the machine can’t pick up exactly where it left off, ruining the final result.
Step 9 — Stitch It Out!
Press start and stay nearby in case of thread breaks or a bobbin running out.
Step 10 — Remove and Finish
- Remove hoop from machine
- Separate the hoop rings
- Remove sleeve carefully
- Dampen topping to dissolve it
- Trim jump stitches
- Press lightly with a pressing cloth if needed
Common Sleeve Embroidery Mistakes to Avoid
Mistake 1 — Using Too Large a Hoop If the hoop is too large, it won’t fit comfortably inside the sleeve, causing the fabric to stretch and distort. On top of that, there won’t be enough clearance to slide the sleeve over the rotary hook, making it impossible to attach. Stick to 12cm or 15cm for most sleeves.
Mistake 2 — Using Wrong Stabilizer Always use cutaway on knit sleeves. Tearaway won’t provide enough support long term.
Mistake 3 — Not Locking the Hoop Rings Securely Always make sure the top and bottom rings are fully tightened before stitching. If they come apart mid-stitch, re-hooping will throw the design off-register and ruin the final result.
My Recommended Products
- Cutaway stabilizer — I use Sulky
- Water soluble topping — I use Sulky
- Mighty Hoops — for longer sleeve designs
- Melco EMT16x — my machine of choice. If you’re looking for a personal embroidery machine, browse options here.
Want More Free Embroidery Tips?
Subscribe to The Embroidery Nook newsletter and get a free embroidery design delivered to your inbox every month!
With love and stitches,
Tiffany
Vancouver, BC, Canada